On the way home from spending time with Astrid, Holly and Gypsy, I saw this beauty on the side of the road and had to get a pic!
Thursday, July 7, 2011
My new car!
On the way home from spending time with Astrid, Holly and Gypsy, I saw this beauty on the side of the road and had to get a pic!
Saturday, July 2, 2011
More doggie updates
Quick news update: Tiny won BOTH shows today!!! He just needs to go in the ring once more, competition or not to get champion!
Friday, July 1, 2011
Purple Turkoid = wearable!
So now my trim is fixed and I don't have to mope about it anymore! All the buttons are attached, so now all that is left are the loops!
TinyMan FTW!!!! (non sewing post, sorry!)
Way to go, Mr. Tiny!!!
Thursday, June 30, 2011
Little bit of progress, little bit of setback
I don’t have pictures at the moment, but I replaced all the nail heads on my chopines; I removed all the plain headed ‘pins’ (actually scrapbooking brads) and replaced them with honest-to-goodness decorative nail heads. The effect is very subtle, but I like the new look, and the pins are much, much more stable.
Also, I mentioned the other day that I’m having problems with my sleeves…..if I can get through two sleeves without *$%&#ing up, the design looks like this:
I’m very quickly running out of fabric, so I’m thinking it may be time for a Plan B. (Gotta figure out what that would be!) If I had unlimited fabric of this color, I would bend it to my will and make it work No Matter What, but since I’m running so low, I’m scared of continuing and ending up with no sleeves at all.
I spent a little while last night making pearl ‘buttons’ for the coat. I actually wanted to use decorative headpins, but all I had on hand were plain ole flat tops. I made a few ‘buttons’ with just the large pearl bead and head pin, but found that the head of the pin kept wanting to pull all the way through. No Bueno!
I went back to my stash and experimented with a bunch of different small beads to use as a ‘cap’, and settled on a small pearl. Not the best/prettiest solution, but 1) it works 2) is stash.
Now for the final test. Here is the trim with the bead buttons in place:
I still really wish I hadn’t made the trim mistake, however, with the buttons may be slightly less noticeable. (I would be putting a crystal underneath the bottom most button to continue the pattern repeat)
So, what say you? Can I get away with it, or should I plan on carefully snipping and re-sewing?
Wednesday, June 29, 2011
Pictures!
-Sleeves
-Buttons/holes
-Ruffle hem
As you can see, I changed the neckline from the last attempt....I'm kind of liking it! :)
I am inordinately proud of The Strid. She created a gorgeous vest from a sketch in just a couple of days! I should get a close up of her welt pockets, they are truly amazing.
And bonus happy dog.....
Tuesday, June 28, 2011
Hubris will be punished…..
I was feeling oh-so-good telling my little stories this morning…..I should have known there was something around the corner!
………well, I started on my sleeves, with everything going absolutely perfectly until over 3/4 the way through. My stamp slipped and made a right mess of an entire sleeve.
GRRRRRRR!
It’s the little things that keep one going….
Recently, a couple of interactions have really buoyed my confidence and made me feel really, really good.
At Laurels Prize Tourney, one of the other entrants came up to me and said “Oh! You’re the one who taught buttons!” I was a bit taken back since I didn’t recognize this lady at all, but replied that I had, in fact taught about fabric buttons at Kingdom Collegium last year. She went on to tell me about the outfits that she had made for herself and her husband using my technique, how well it worked, and had even taught a lady in her group that very same morning about the magic that is fabric buttons.
It seems like such a little thing, but she was so excited about it all that I was walking on air for the rest of the day. I felt reinvigorated to teach even more classes, and to get back to some sewing.
Unfortunately, I didn’t have the presence of mind to exchange contact information, and I for the life of me cannot remember her name, but mystery lady from the North…..you MMD. Seriously.
I also had a chance to catch up with Beatricia. I tried to explain to her just how much she has influenced me over the years, but she tutted and said “Me? No – you were already well on the right path”.
But seriously, this woman has guided my every costuming thought*, though I only saw her but once or twice a year. She has always been so kind and supportive, giving gentle criticism when due, and praising the positive at every opportunity.
She certainly doesn’t only treat me in this manner, but has always been this kind to everyone. I truly aspire to be at least a little like her one day, she is my hero, both in costuming and in deportment. I love this woman so very much, she has given me an ideal to aspire to.
*I kid you not, when I’m waffling about something or thinking about taking a shortcut, I think to myself, “What would Beatricia say?”
Monday, June 27, 2011
Uh….if I told you aliens abducted me, so that’s why I haven’t posted, would you believe me?
What? No?
Oh.
Um…..well, life has been capital C C-R-A-Z-Y.
And then there’s getting ready for Barons War. Which is only a few short weeks away. Yikes! Good news is, there is more or less only the whites for hubby and I to go (plus some other nit-picky things as far as the clothes go….I’ll get into one of those things in just a few paragraphs.)
But I should update on what I’ve been sewing on! Although there has been silence on my end, and my steam is certainly running out, I’ve still managed to be somewhat productive.
Here’s me with tiredface and wild hair. But look at my hair – not really the hair, but the pearls and bows! Since all of my hairpieces match my old hair color, I also need to make more braids; I have two different shades waiting for me to test out and make up some hair pieces. (The ribbons are gold….kind of hard to see in this shot, but are trying to mimic the pink ribbons in the portrait below….)
I didn’t have enough gold findings to do pearl-and-gold as I was originally thinking of, but I think plain pearl suits me better anyway. I’m really mostly a plain-jane kinda gal. Here’s one of the portraits that has the hair action I’m kinda going for:
| Portrait of Isotta Bermbati Grumelli 1550-1555 Giovan Battista Moroni |
| Portrait of Isabella de Medici - ??? (via Aneafiles) |
And here’s the ‘big’ update……the Turkish coat is nearly done! (I’ll explain the ‘nearly’ part in a minute…..)
| Portrait of a Lady 1555 Titan |
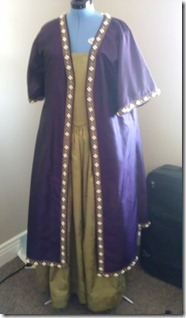
Over all, I’m pretty happy with it!* It’s a bit shorter than I had originally planned, but what with limited fabric and somewhat wonky hem action, there wasn’t much I could do about it.
What is really bugging me, however, is the skipped space in the trim. Of course it didn’t happen, yanno, on the hem in the back or something. No. Right. Smack. In. The. Front. See it?
Of course I didn’t notice it until all the trim was sewn on and I put it on for the first time and looked in the mirror. I saw it and about had a breakdown.
Anyway, so my options thus far are as follows:
- defensively walk around with my hand firmly placed like the portrait and cover up the mistake. (Not too practical, I admit)
- try and forget about it, (Yeah. Right.) and tell myself that no one will notice. (See above)
- Re-do the trim from that spot down. (Time consuming and especially difficult as it’s sewn down now.)
- Use that empty space for buttons. (Most likely scenario)
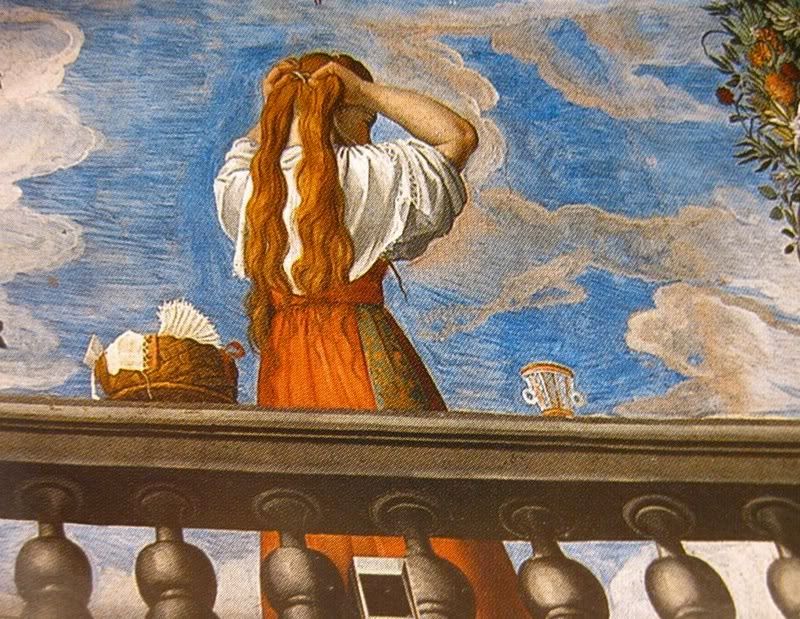
Below is a detail of the trim on the portrait…..see how the buttons are on the edge of the trim?
| Detail of: Portrait of a Lady 1555 Titan |
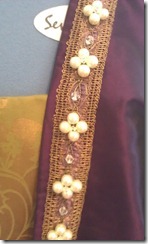
Ok, enough angsting about that for a minute. Here is a close-up of both the neckline and the sleeve:
ETA: I should mention that the reason I’ve not listed re-spacing the beading as an option is because the trim has little spaces for each of the elements, so I’m not sure if I’d like putting the crystal in the ‘X’ of the undulation rather than in the center as the rest of them are. Dunno. Does that change anyone’s opinion? (Um, yeah, it is much more obvious IRL than it is in this crappy pic.)
Also of note, whether I end up using the partlet I’m not-quite-in-love-with-for-this-outfit is done, thanks is large part to my momma and Elizabeth! I do like this partlet, but maybe just not for this dress. I’m still undecided!
Also of note, I picked up the blackwork for my camacia (potentially new/4th partlet) from the ever-fabulous Jaquelinne this past weekend. It is smashingly awesome. Seriously, you have no idea! My goal is to get that piece into a finished garment by the end of the week!
I also dropped off linen with my Apprentice sister at fighter practice yesterday and she posted last night about her blackwork progress for my hubby’s shirt. Holy cow can that woman embroider!!!
*It’s short, the sleeves are much wider than I had intended (but look less crazy big when my arms are in there), the bust/waist are not as fitted, but hey, that means it’s more comfy?
Monday, June 20, 2011
Uprising Redux
Pictures? No. I am the worst when it comes to taking pictures at camping events….what follows is devoid of pictures; though I’ll go trawling through teh ebil Facebook and see if there is any pictures out there….
Where to start! Uprising was such a blast. I had an excellent time, and Holly’s camp was welcoming and wonderful as always. There were a bunch of people I missed terribly, but hopefully that will be remedied at Baron’s War. Nothing like hanging out with My Peeps to make everything seem right with the world!
Uprising was cold. Like, hardcore cold. I think I was a little taken back since the last couple of years have been unbearably hot – I had kind of prepared myself for that outcome! Thankfully, I had the foresight to pack my old blue woolen cotehardie…..I ended up wearing it nearly every day! (Changed into it after dark when it got really cold) Adding to my list of things I forgot/couldn’t find…..I couldn’t find my wool hood that goes with that cote, but I wasn’t worried since I was expecting to never even wear that dress. Oh how wrong was I?!
Pastiche, one of my favorite dealers-of-choice was there, and I wandered over to grab some wool to make a quickie hood (since I had my entire sewing kit, why not, right?) as she was cutting yardage of some yummy plum wool for my new hood, I turned around and saw an already-made mantle. So I bought both. >.< (I also bought a couple of awesome books – I’ll talk more about those in another post)
And I have a secret……..I totally remembered why I loved my old persona. Camping. Oh yes. I’m going to have to rebuild my earlier period wardrobe…..I was so comfy and warm!
My bed. Let me tell you how much I love it. It’s high enough I can shove all my totes underneath and hide them all away – and the futon is nice and insulated. I just need to get some more sheep skins to finish lining the bed, and I’m good to go! (I actually do want to make new bedclothes specifically for the camp bed, but that will have to wait until after I’ve gotten a pavilion!)
I have a terrible addiction to period pottery, and there is a gentleman here locally that has started to produce some excellent pieces. I picked up two new cook pots (one with feet and one without) and a jug for Holly.
I didn’t sew on a single piece of trim for the Baron’s War coat; it was just to rainy/windy/miserable to be very productive!
As crazy as the weather was, I am completely re-invigorated for the camping season……now to find myself a pavilion (again)!
Wednesday, June 8, 2011
Orange pegs no longer orange
I picked up a can of 'hammered finish' plastic spray paint to try and tame the orangeyness of the stakes.....first coat, so far so good. What is unknown at the moment is how well it will hold up! Usually the ground is soft enough to step on stakes to set them, I'm having a feeling it will last at least a season....or at least I hope so!
Laurel Prize Tourney @ Uprising
I’ve gathered some bits and pieces from my various projects and have put together a spread for the Prize Tourney at Uprising.
So far I’ve got:
- Effigy bodies + documentation (this is what I entered in KA&S not this last time ‘round, but the year before. I figure there will be enough people at Uprising that have not seen them before, it’ll be fairly new still. I’m bringing my documentation as well, just because I worked so danged hard on it! I’ll not be bringing Bertha for display as I did for KA&S. I’ve been wearing them for a year, so they’ve seen the world and are a little worn, but not terribly so.)
- PPoD top (This is the Pin Pillow of Doom, for those of you who don’t know the acronym yet! It took me almost exactly a year to finish this bad boy, and I’m planning on entering it at the next KA&S, in pillow form. For the LPT, I’m just bringing the top and a picture of the original (as documentation isn’t at all required, but I would like to show my original inspiration). The good thing about this project being technically unfinished is that I’m able to show the back of the piece, as once it is sewn into a pillow, it’ll be hidden from view for all time and eternity.)
- Red velvet chopines (I’m just too danged proud of these to not bring them. There are a couple of shoe peeps that I know will be at Uprising that I’d like to have see them.)
- Blackwork “sampler” (This is a fairly old project, but I don’t think I’ve ever really entered it in anything….it’s been floating around my packed boxes for years and years, and recently resurfaced. I’m fairly surprised at how well the skill level has held up….I’m a much better stitcher nowadays, but I think this piece was right at the turning point of skill, and fairly well represents my needlework, even if it is on the rougher side.)
I’m thinking of bringing a couple of other ‘WIP’/demo things; I’ve been (very) slowly working on a carved comb, and may bring my carving tools to continue on that for the duration. I’ll also be bringing my polychrome coif from about eleventybillion years ago. I may not be happy with some of the stitching decisions I made in the past, but I may as well pick it back up again and finish it off. I’m wiffling on whether to bring some button samples, but that seems so…….well, boring, even if I do think they’re the bees knees!
Can you tell I can’t sleep??
Tuesday, June 7, 2011
“Oh for heavens sake” Uprising Edition
I’m starting to panic about getting ready for Uprising, but feel better after digging through boxes and setting out outfits. I’m kind of pleasantly surprised; I have plenty to wear without digging too far into the ‘embarrassed to wear’ pile, or use the new green gown, so I’m pretty excited. I went through and emptied enough tubs to (hopefully) carry all my crap.
Right now the only thing I’m missing that I’m really freaked out about is my pulled work coif. (there’s plenty of other stuff I would like to find….like…….where the heck did all my drawers and stockings go, really?!) I wore my coif at Southern Regional Collegium, then I took it off to show how I had done it, then……………?
I’m completely blanked on what happened to it after that. Grrr! I cannot keep that thing in my possession for more than one event, I swear!
I have a whole ton of stuff (garb, mundanes, bedclothes etc) to wash over the next couple of days, and yes, another shopping trip to stock up on batteries, baby wipes, hand sanitizer. (You know, the necessities for camping!)
I also need to clean out my car and get an oil change, pick up the trailer and start packing for reals.
It doesn’t sound like a whole lot, but since I got out of the camping groove a few years ago, it seems harder and harder to get it all done!
Shade Fly–Complete!
Bright orange stakes notwithstanding, the shade fly is now complete! I can’t say I’m 100% happy with it, but will suit my needs.
I had thought that making my own shade fly would make it less expensive, but what with all the bits and pieces I ended up purchasing, I spent nearly as much as a commercial shade fly, without all the extras. Oh well, it was a learning experience!
The back is facing due north, so is not very shady, as the moniker “shade fly” might suggest. The curtains I hope will come in handy as the sun moves across the sky, making shade where needed. I’ll also try to set up with the back facing west whenever possible so from noon on it should stay fairly shady on it’s own.
I’m hoping to pick up some plastic spray paint in black to tame some of the ‘orangeyness’ of the stakes, and I’m wiffling on whether I should get a length of dowel to make rope tensioners; but if it doesn’t end up happening, I’ll still survive.
I’ll be taking it to Uprising for a trial run to see how it does….wish me luck!
p.s. It's set up a bit wonky and I didn't straighten the poles....both things that will be fixed for a 'real' setup!
Little Girl Dreams
As it is velvet, I’m going to hope that the current silk & embroidered net dress holds out through the warm season so I can whip this one up when it gets closer to winter and cooler temps.
Anyway, here it is!
| Child's Dress 1870. V&A Museum |
Radio Silence Apologies & Barons War Update
Sorry folks, it’s been a weird, weird weekend, interspersed with not feeling too swell….makes for a bad time for posting!
On a brighter note, I’ve been hand-sewing the hem of the red dress, and the hem is now done. (I never thought it would end…..I ended going around the hem four times in different spots to make sure the felt stayed where it ought to be.)
Some awesome new developments have come up RE: Barons War. Jaquelinne has offered up her black work strip for the red dress! It will either become the inside band of a partlet collar or the front band of a camacia – either way, I’m SO excited! You can see her work over here….go look!
Praksedys has offered up her skills to create lacing for the red dress, and that is quite a weight off my shoulders. She’s an amazing woman!
Also, my brother in law has agreed to arrange the dinner. He has been going above and beyond, and I am so excited what he comes up with, because right now we may need to invite the entire Kingdom to eat all the nommy dishes that he’s cooking up.
Dressed pheasant via “of food great and small”
I told him that I had wanted Cornish game hens and spinach & goat cheese salad, but he was free to add to that menu; and he has completely run with the whole “game bird” idea. (I *heart* wildfowl. Like, seriously.)
Peacock served at a feast via “History Undressed”
From what I hear, there is going to be a whole spread of game birds (game hens, quail, pheasant, potentially duck or goose), a couple of rabbits, and the crowning glory……….a roast peacock*. YES. I will have a peacock! Instead of stuffing the poor bird back into its skin after roasting**, I’m thinking of arranging clean tail feathers at the back, and gilding the bird. I need to do some more research on that, but that’s my initial plan.
Peacock served at a feast via “Larsdatter”
*For those totally grodied out by game bird and/or rabbit, there will be plenty of other (less weird) foodstuffs available. I’m not sure, but I may be taking reservations to the extent of finding out how many people would need/want meats other than fowl & coney.
**I’m not entirely sure it’s hygienic, even if the skin is cooked (which may actually destroy the feathers anyway)….birds tend to be kind of dirty little critters.
Saturday, June 4, 2011
Partlet(s)
I’m nearly finished, but not so much in love with my first attempt: (It’s nearly finished, so I’ll probably just finish it off and hide it somewhere in the back of my closet just so I have it if needed. (One can never have too many partlets?) The original plan was to put spangles all over the edges like in a bunch of portraits in Moda, but I chickened out before I got that far.
Which is meant to be kind of if these two had weird, fugly babies:
| Portrait of a Florentine Lady 16thc Allesandro Allori/Workshop of Alessandro Allori |
| Mother and Son 16thc Sofonisba Anguissola |
At any rate, I decided I didn’t like it (too many things wrong to detail here.), and was going to start again, only this time I was going to try a different style. I think I stopped myself from committing too much time to this one before I realized I didn’t like it…..and I’m not liking it.
I’ve gotten as far as gathering up the entire yardage on gold cord before I hit the brakes.
It was meant to be somewhat like this one, only a bit more-different-other.
| Giulia Varano, Duchess of Urbino 1545-47 Tiziano Vecellio (Titan) |
I really need to sleep on it and see what I think in the morning, but my next attempt will probably be either a simple collared one: (I’ve actually made the one on the right for Aine, so I know I can do it, as long as I get out of this weird funk)
| Portrait of a Lady 1550s Jacopo Robusti (Tintoretto) |
| Portrait of a Woman 16th Unknown? |
Or a gathered-neck style: (Only probably less crazy than this one, I just like the black spangles!)
I’m taking a break tomorrow to go to my baby brothers wedding reception, so I’ll have plenty of time to take a break from sewing for a minute or two, recuperate, and ponder my next move!
Friday, June 3, 2011
Saccoccia
There are a couple of different pictures of saccoccia in blue and gold – I happen to have a bit of blue and gold scrap fabric, so I decided to do this quickie tutorial in that fabric.
I sewed this on a machine, so isn’t at all something I would show off as ‘period’, but is good enough for holding cell phones and cash hidden under skirts at events!
I don’t know how to upload documents yet….I very carefully drew this out to scale in Photoshop, then realized I may not be able to upload it as such!
Aaaaaaanyway…..it’s not that complicated of a pattern…just kind of an elongated teardrop shape. (I would suggest making the top longer than you think it should be….you can always cut off excess at the end)
Hokay. So, you’ll want to cut 2 fabric & 2 lining.
On the wrong side of your fabric, draw the slit line. Sew around the line as close as you can.
When cutting the slit, make a “Y” cut at the end:
Turn right side out & press slit. (I top stitched the slit opening for extra durability)
Pin lining out of the way, and pin fabric right side to right side. Sew around the outside edge, clip & press.
Pin fabric out of the way and pin lining right sides together. Sew around outside edge, clip & press.
You’re going to end up with a bellows-looking thing. But don’t worry!
Turn right side out and tuck lining inside. I’ve been folding over the top and stitching down, but you could bind the top edges or make an internal casing.
Voila! Saccoccia!